Monday, December 31, 2018

Évolution de la Cuisine; le Plancher


Tile floors were the preferred flooring during the time Montegut was built. We guess it was sometime in the very early-1800s.  A foundation of packed soil and sand was common and has proven to be durable. However, due to settling, all the downstairs floors have many cracked or even shattered tiles.  Replacing damaged tiles was not an option as they are no longer available.

Once the walls and ceiling are replastered and painted, the floor is next on the list.


The first step to prepare the floor was to level the existing surface.  A 1-meter grid was laid out using small hexagon tiles - here, you see three tiles that identify how much material will be needed to bring that area up to level.


A float is a pure cement mix sans gravel that was poured to cover an area about 1 square meter at a time. Barry got very good at pouring that float to the exact level!


If you search, you can see a few spots where the small tiles are identifiable. At the end of this workday, a total of 8 bags (80 lbs each) of the float had been used to level the kitchen floor!


We returned to the kitchen project after enjoying visits from family and friends. Tile placement was first sketched out on paper, but seeing the tiles on the floor was important. Taking into account the uneven walls, placement of cabinets and appliances helped us make some minor adjustments.


Together we settled on the layout!


Thorough cleanup and final layout to mark cuts, and we are ready to mix some mastic!


All goes well, and only a few simple cuts are needed. As we've learned, there is always something that pushes us to master a skill, and this last cut was a challenge.


And he does it again!


Our quality control consultant Millie checks one last time before the grout goes on.


A narrow baseboard of tile is added for a tidy finish, and it is done!

And if you have, thanks for reading
Au Revoir 

Sunday, December 23, 2018

Évolution de la Cuisine; La Démolition


Our kitchen renovation begins with some serious demolition.

The kitchen was added to the original house structure sometime in the1900s. Until then, all the family meals were cooked over the fireplace in what is now the dining room. This new addition had a dedicated bread oven and a large fireplace where all meals were prepared. At that time, a separate kitchen was quite a modern innovation. Clearly, progress had arrived at the Dargeles farm!

We've been eagerly anticipating this endeavor for a few years and hope we won't find serious structural problems! If you've been following this journey, you know we always seem to encounter a few surprises as we get deeper into a project!


First, cupboards and pantry are emptied. Then chipping off the wall tile and then cabinetry will be removed. The refrigerator and the small combination electric stove with gas oven were moved earlier.


This countertop measured slightly less than 32" or 81cm high. The average countertop height in the US is 36".

The wood-burning stove will be removed.  Apparently, this was "the go-to" for roasting the beloved Leg of Lamb for family celebrations. It has been well used and built to last! 

It is cumbersome. The oven is encased on all sides (except the door) with 2 inches of cement. The top surface was 2 inches of solid steel. This alone took two strong men and a heavy-duty hand cart just to get it outside. Later a crane would lift it into a moving truck. The stove's exhaust pipe extending through a rectangular sheet of steel covering the chimney opening is removed. Along with the metal sheet, more than a bushel of debris came tumbling down from the chimney.

Twigs, small branches, and paper for use in the woodstove were stored on the floor to the stove's left. At the end of the counter, a small black cast iron door opens to the original bread oven.

The door out to the kitchen garden stands open.

Steel and glass exhaust hood had been attached to the wall and ceiling with heavy gauge angle iron extending 4-6 inches into the wall and thick sheets of glass.


All the electric conduits will be removed, and wires rolled up and clipped to hold them out of the way. Electricity was added sometime in the '40s the conduits are still used in this area. Even in new buildings as they are now built using cement or terra building blocks. There are only a small handful of wood-framed houses in this area of France.


The kitchen door and door shutter help keep the house secure. All exterior walls are 1 meter thick, as are most of the interior walls. A local artisan has built a new door with dual-pane glass, one large window the door's length that will allow the sunlight to flood the room.

The demolition begins and lasts several days. Then the debris is loaded and taken to the local dump.


The counter was constructed using cement blocks and bricks, with available bits and steel pieces to add strength.  The countertop was 4" thick and glazed tile layer on top. The wall tile easily popped off the wall, but having been adhered to the adobe wall with cement left deep, ragged pocked marks. Plaster filled the deepest holes left to dry, and additional layers of plaster would create a smooth surface.

Hot, dusty, and slow work, both necessary and critical.


It came as no surprise that there would be plumbing work ahead. The question is, how long has this area been wet and how much damage is under those wet tiles?


Even the countertops' horizontal support was solid concrete.


The still reasonably useable sink was left in place as long as possible.

Yes, that is a sledgehammer, a necessary and frequently used tool for this project.


Much better! The shovel proved to be as essential in the cleanup process as a broom.

Deeper holes in the walls were first filled with cement with latex added to ensure adhesion.  Next comes plaster. The first coat is a rough layer left to dry thoroughly before additional thin layers are added until the walls are flat and smooth. Sanding comes next and is tedious but essential.

Traditionally the handmade baked clay floor tiles were laid on compacted soil and sand. A long-proven method that has lasted well more than a century in this and other rooms on the house's ground level.

However, after seasonal rains, periodic flooding, and the regular irrigation of the crops surrounding the house compromised tiles in the northwest corner.


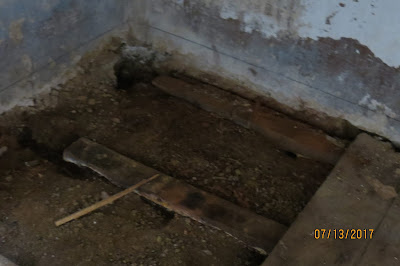
Broken tiles, loose dirt, and stones were removed, and the area is again compacted and leveled. Next comes a waterproof membrane, then a couple of inches of cement was poured to create a new foundation.


This ceiling rafter had considerable wood damage, multiplying over decades from soot, water intrusion, and insects. This region has an ongoing problem with the Wood Bore Beetle. Fortunately, there is a non-toxic spray that kills the insect and prevents further damage. We've made a point to spray all wood surfaces, whether it be ceilings, furniture currently in the house and, older pieces we purchase. The entire wood ceiling is then cleaned, scraped, sprayed, repaired, and sanded in sections with two primer coats.


These two walls are plastered, sanded, and ready for the first coat of primer. Progress is good!


Plastering all the wall surfaces, layer after layer, continues until the surface is flat and smooth. Inside the pantry at the left in the photo below is replastered and painted as well.

Ready to smooth out that wall with some plaster!


The sink is finally removed, and the plumbing is capped off. The new sink will sit under the window again.


Walls are all plastered and sanded. The ceiling has been repaired, sanded, and painted with two coats of primer and 2 coats of oil-based paint! We wanted to keep the natural wood, but the damage was too extensive.

The old window will be replaced with a new dual pane window. As much charm as it adds to the house, the glass is too thin to provide much insulation and is fragile.


Barry begins to construct a wood panel to cover the old chimney opening.


A coat or two of paint, and it will be done!


View from the northwest corner, the dining room is on the left and the hallway to the bath, and the wine cave is the doorway to the right! The old electrical wires are looped up and away until next spring.

Next up? Stay tuned for the floor transformation.

And if you have, thanks for reading.

Au Revoir


.


Friday, December 14, 2018

Asiatique Frelons!


What IS that, high up in the tree?


Wait... is that...


OH DEAR... it is


HORNETS!


To be specific it is the Asiatique Frelon!  

"Biologists call it "Vespa velutina nigrithorax". Better known as "Asian hornet", this insect appeared first in Bordeaux hiding in pottery imported from China. The Frelon has managed to migrate to all departments in France. Appearing to follow waterways the nests are found primarily near orchards and bees as fruit and honey are the favorite food. 

But it happens that it attacks humans.

This is bad..really bad.

The Asian hornet is very easy to recognize because it is the only wasp in Europe to have such a dark color. The Asian hornet is predominantly black, with a broad orange band on the abdomen and a yellow border on the first segment. His head is orange and his legs are yellow at the ends. It measures between 17 and 32 mm (approx. 1/2" to 1 1/4")
As the name suggests, the species is from Asia. Also found in northern India, China or the mountains of Indonesia.  In just a few years, they spread everywhere in France as well as throughout Spain and Portugal.  This summer (2018) it made its first appearance in England.
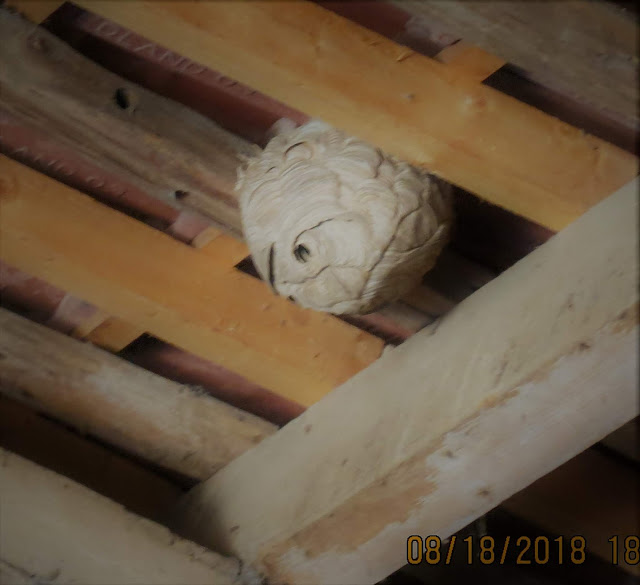
This wasn't the first sign of the Asiatique Frelons in Montegut.  The nest below was discovered inside the barn on August 15 and removed a few days later. This nest was about the size of a basketball.


But when this guy flew inside the house we knew it was time to take action. That was a fatal mistake on his part.

The large, 1m x 1/2 m nest in the willow tree has been removed. We are now vigilant and well prepared (with powerful aerosol spray) in our quest to keep Montegut hornet FREE!  

And if you have thanks for reading 

Au Revoir 

Friday, August 31, 2018

Octave's last letter to France

Octave Valere Dargeles

24 June 1867 Montegut Arros, France

16 October 1927 Caruthers, Fresno County, Fresno, Ca., USA


Brothers Octave and Jean Marie, with their father, left Montegut before dawn one morning in1885. 
They traveled slowly over dirt paths in an ox cart pulled by the family cow. The beginning of their journey would take them the better part of the morning to reach the nearest train station 13 km away in Rabastans de Bigorre. 
It was here their father, Raymond Dargeles, bid them a final and emotional farewell. Their adventure had begun. They boarded the train to deliver them to Bordeaux and then on to a steamer ship to New Orleans, Louisiana.

These two young men would never see their french family, Montegut, or France again. Yet, they would always feel a strong connection to their family.

Octave and Jean Marie were the two youngest sons in the family. A sister, Helene, and older brother Joseph would stay in Montegut.  Octave and Jean Marie were given what little money the family could spare to pay for their travel. There was little work in their area of France, and being adventurous spirits, they turned their sights to unknown possibilities and stepped confidently toward their future.

The brothers stayed in New Orleans, enduring a bitterly cold winter. Neither Octave nor Jean Marie spoke English upon their arrival. They worked hard to learn both the language and customs in the US. Thankfully, there was a fairly large population of native French speakers, and they soon found lodging and employment. But their goal was California!

Both young men were hard workers and eager to continue their travel to California. They hired on to a cattle drive headed west. Keep in mind this was a purely American occupation. In Montegut, they cared for the farm animals, including horses, milk cows, pigs, sheep, and chickens, which held little resemblance to the American Cowboy's new duties!

Arriving in San Francisco, they were directed to a large community of French immigrants near San Jose. Here they were welcomed and encouraged to pursue their dreams. Quickly able to find work, they worked long hours and saved money while mastering a new language and making plans for the next step of their adventure. Ironically, it was in San Jose where they learned to bake French bread! Little did they know it would be a large part of their future. For these two optimistic young men it seemed nothing was out of their reach.

Both brothers learned how to bake bread! Soon Octave and Jean Marie were introduced to two beautiful French sisters. Victorine and Nancy Bonnabel had recently emigrated from the Lyon region of France. In 1890 Octave married Victoria and Jean Marie married Nancy.

They decided to leave San Jose and settle in Fresno, located in California’s Great Central Valley, which has a climate and terrain similar to their beloved Montegut. Fresno was still a young but energetic town with dirt streets, wooden sidewalks, and a railroad station. There was only a spark of what would later become one of the most important agricultural centers in the United States and eventually the world.

Octave and Jean Marie opened the first French Bakery in Fresno. The bakery was located at 1318 K street AND with a telephone 771 Red (1900 letterhead). It was a broad wooden building with two large windows with striped awnings to tame the hot Fresno summer sun. There was a living area above the bakery. Soon a baby arrived. Jean Marie and Nancy welcomed their son, Cesar, Then Ernest, the first son for Octave and Victorine.  The flat soon became crowded, Jean Marie, Nancy, and Cesar moved to a small house nearby. Octave and Victorine’s family continued to grow; Frank and then Henry was born.

Sadly, in 1897 Jean Marie died of tuberculous in a sanitarian in San Jose. Nancy and Caesar stayed in Fresno. Nancy remarried, and Cesar was adopted and raised by Octave and Victorine.

The bakery was successful… but the wine business in the basement provided the majority of their income. The business soon became The French Bakery and Wine Cellar.

In 1907 a daughter was born, Octavia Victorine Dargeles, Barry’s mother. A couple of years later, Francine, a second daughter, followed by Raymond (later nick-named Frenchie).

But Octave was not satisfied. He longed to return to farming in his heart, the thread that connected him to his Montegut roots and France. From father to son, for a century or more it was who he was and what he wanted for his family. In letters to his brother Joseph, Octave shared ideas of combining American and French farming techniques he was convinced it would be successful.  He purchased a section of land (640 acres) in Caruthers. And for a few years he continued the baking in Fresno and then took the wagon to Caruthers to work the rest of the day developing his vineyards and dairy farm. He designed and built a large impressive home, reminiscent of Montegut, for his family. After all the years, he still held those country values and memories in his heart, so in 1911 he moved his family to Caruthers. Stories repeated through the family stated Octave felt that Fresno had grown too big, too metropolitan for his children!

Octave regularly mailed letters to his family in France, sending news about his family and business. Finding these letters has been a gift beyond any expectation. The last letter we have found was dated 1911, there were certainly more, but we are grateful for those letters that survived.


A family portrait arrived in Montegut just before the turn of the century. This beautifully framed photo has been hanging in Montegut for nearly 120 years. Victorine (1872-1957) with Ernest (1895-1950) and Frank (1898-1972), Octave with Cesar (1895-1943).


There was close to a 100-year span from Octave’s last letter to his family in France and the arrival of France's first letter to the few remaining Dargeles descendants in the US. Which in turn, changed the course of our life by reconnecting us to our French roots.

And, if you have, thanks for reading.

Aurevior

Tuesday, August 28, 2018

Another Finish!

The floor under the stairs at the foyer was in dire need of renovation. 
The area was covered mostly with wood planks sitting on wood joists. I say mostly, as there were large spaces where the wood had been removed and replaced with old lightweight cardboard. Needless to say, it stayed damp year-round and, yes, musty and smelly, too. A small area of cement was perhaps added after a major flood in the early '90s. That repair at least helped stabilize the base of the staircase.

This is the finish!


And now, photos of the starting point.
Here are a couple of the wood joists and planks from the original floor. The blue line on the wall was used to level the floor. All the wood had long since rotted and went directly to the "burn pile".


A thick layer of gravel was added around the existing cement area.


Notice the gravel stills sits well below the marked level line.


Water-bearer liner topped with a metal grid to reinforce the cement. And now it is time to add the cement.


  The first stack of cement bags, a total of 40 bags, each weighing 70 lbs, would be needed to complete the project.


This bucket held only half a sack of cement.
Total sacks = 40  Total buckets of cement = 80, hand-mixed, then leveled (screed) with a longboard, then troweled and brushed to create the tile's correct texture installation.
All's well, he still gives me the "thumbs up" signal! This is exhaustion.


Tight work area under the first few steps, several feet of work was done lying down.


One extremely long day of mixing and pouring cement, and it is time to rest over the weekend while it dries.


Plastering the walls is the next up on the agenda.  Clean, patch, plaster then sand then clean and paint! Clearly easier said than done in tight quarters, and shall I even mention the dust! We had "downstairs shoes and upstairs shoes during this process," although little good it did. 


We tried to create a barrier to limit the dust from the sanding process. We used several rolls of tape to make only a very slight difference. Lesson learned; you have to clean anyway.


Freshly plastered, sanded, and painted walls.


Now for the tile installation. Walls are ready and the floor is level just a matter of laying out the 18" tile in a grid. 
Easier said than done, but why would this be any different than any of the previous rooms? Well, it wasn't impossible. Just needed some extra planning as not 1 of the 3 walls was straight or flat.


That cut around the curve of the step will be tricky.


A little encouragement never hurts. Millie lends her support.


And he does it!


Beautiful cut, and it fits perfectly. And now for the grout!


And done! We have found a lovely old sideboard for this space, and once in place, that crooked wall will never be noticed.


And, if you have, thanks for reading.

Aurevoir